Sign up now to unlock Rewards offers.
Free standard next‑day delivery to most UK areas

Small Bathroom Shower Enclosure Ideas for More Space
Discover shower enclosure ideas for small bathrooms with sliding bi fold corner and frameless designs that save space and enhance style
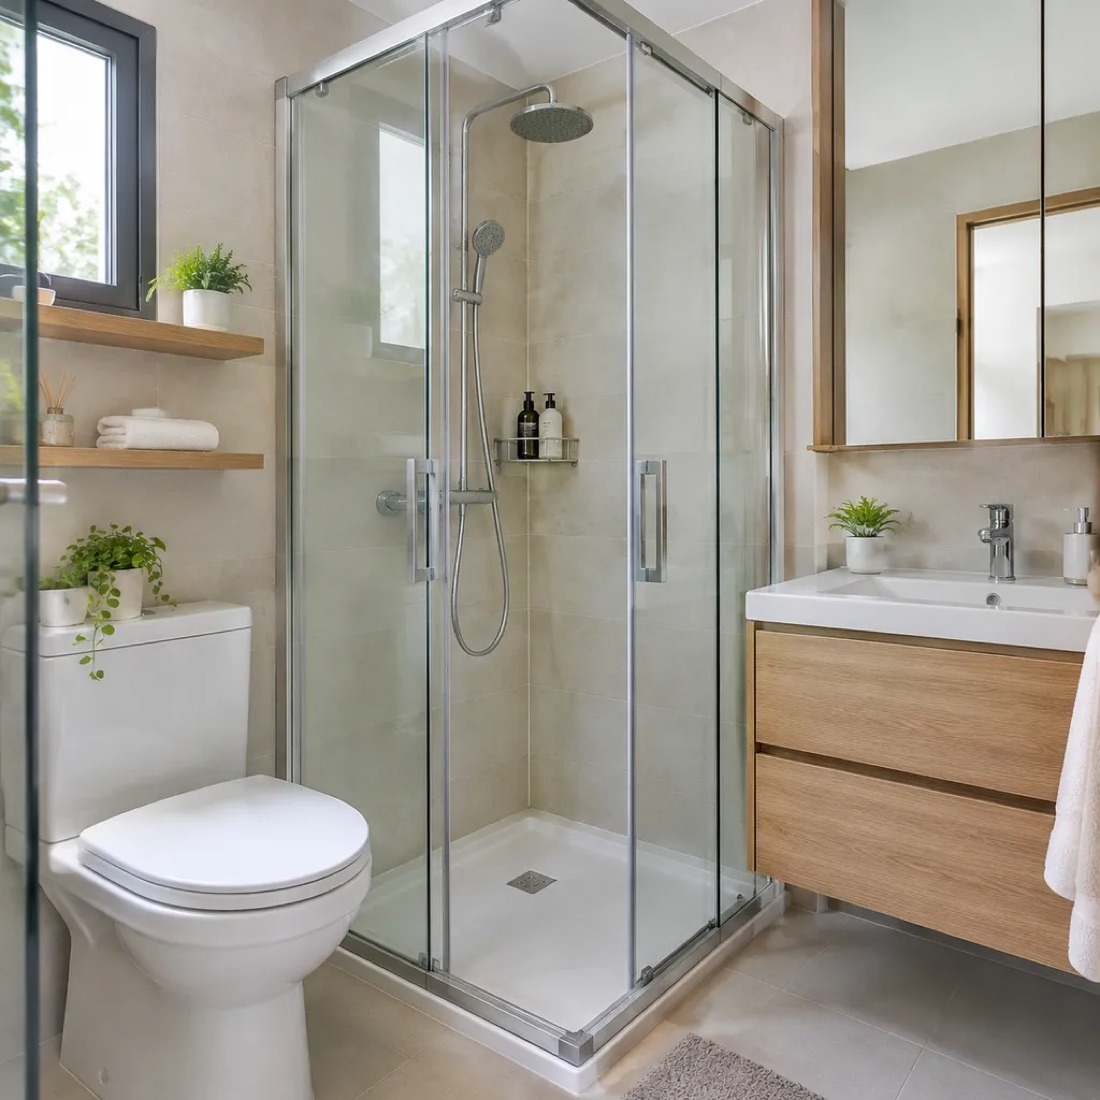
Are you struggling to design a functional layout in tight square footage? Choosing the right shower enclosure for small bathroom spaces can completely transform how open, bright, and comfortable your room feels.
From clever corner footprints and zero-clearance sliding doors to frameless glass that tricks the eye, the right setup eliminates bulk without sacrificing style. In this guide, I’ve rounded up the best space-saving ideas to help you maximize every inch of your floor plan—whether you're planning a full remodel or a quick upgrade.
Let's dive right in!
Shower Enclosure for Small Bathroom: Space-Saving Ideas
Start with the Bathroom Layout, Not the Enclosure
When I plan a shower enclosure for a small bathroom, I never start by picking out glass styles or door hardware. The tightest bathroom headaches—like a shower door clipping a sink vanity or leaving barely enough room to towel off—happen when you fall in love with a unit before mapping the room. Starting with your exact floor plan saves time, money, and installation frustration.
1. Measure the Usable Footprint
- Width and depth: Measure wall-to-wall space at multiple heights, accounting for wall tiles or uneven surfaces.
- Inside showering space: Check that the interior area feels comfortable once the enclosure walls and shower tray are in place.
2. Map Every Fixed Obstacle
Before choosing a small bathroom shower layout, mark the exact spots for: The toilet and sink/vanity (especially wall-hung or corner cloakroom units) Baseboard heaters, radiators, and towel rails The main bathroom doorway swing and any storage cabinets
3. Check Door Clearance and Walk-In Routes
Trace how you actually step into the shower. If an outward-hinged door swings straight into your toilet or blocks the bathroom entry, switch to a space-saving mechanism—such as a sliding, inward-sliding, bi-fold, or pivot door—that preserves floor clearance.
4. Verify Plumbing, Drainage, and Wall Positions
Confirm where your water supply lines and floor waste sit before locking in a shape. Matching your enclosure to existing wall corners (such as L-shape corner units) and verifying that your ceramic or stone resin shower tray aligns with your drain keeps installation straightforward.
5. Cross-Check Product Specs Against Real Room Dimensions
| Layout Check | What to Verify Before Buying | Why It Matters |
|---|---|---|
| Stated Dimensions | Compare exact enclosure width/depth (e.g., 1400 x 1200mm screens) against finished wall measurements | Prevents overhang past tiles or gaps against uneven walls |
| Entry & Handle Side | Confirm reversible panel options or left/right handle placement | Ensures you can open the door cleanly without hitting nearby fixtures |
| Installation Guides | Review product-specific fitting instructions and wall requirements | Confirms your walls can support heavy toughened safety glass |
Choose a Door Style That Preserves Floor Space
When floor clearance is tight, the wrong shower door will clip your vanity, toilet, or bathroom entry door every single time. Picking the right mechanism is the easiest way to save room without shrinking your actual showering area.
Sliding Shower Doors
A sliding shower door keeps the glass panel strictly within the enclosure footprint. If your sink or toilet sits inches away from the shower entrance, gliding tracks prevent any outward swing into your walkway. Best for: Narrow layouts and alcove setups where outward clearance is zero. Options: Standard single sliding doors (like 8mm frameless glass panels) or double sliding doors on curved enclosures.
Inward-Sliding Doors
Inward-sliding enclosures pull the door inside the shower area rather than pushing it out into the bathroom. You keep a fully enclosed space that locks in heat and water while freeing up the floor right outside. Models that include an integrated towel rail bar also save wall space by keeping bath sheets within arm's reach.
Bi-Fold Shower Doors
If you have a narrow opening where a sliding track won't fit, bi-fold shower doors fold neatly inward on a central hinge. They drastically cut down the clearance needed outside the tray. Just compare the folded panel thickness against the total doorway width so regular users still have a comfortable entry gap.
Pivot Doors
Pivot hinged doors swing open on top and bottom pins rather than side hinges, meaning a small portion of the glass tucks inward while the rest swings out. They work well in select compact layouts, provided you map out the exact swing arc to confirm it clears nearby fixtures.
Walk-In Screens
Fixed walk-in shower screens eliminate moving doors and hinges completely, removing all door clearance worries. Because there is no door to block spray, you have to plan carefully around water containment, screen length, and showerhead placement to keep the rest of your bathroom floor dry.
Door Clearance and Access Comparison
| Door Style | Outward Clearance Needed | Entry Width | Key Trade-Off |
|---|---|---|---|
| Sliding | Zero | Moderate (depends on track width) | Tracks require regular cleaning; needs enough wall width to slide open. |
| Inward-Sliding | Zero | Moderate | Takes up brief interior space while opening and closing. |
| Bi-Fold | Minimal to none | Wide | Folded glass takes up a few inches of the entry width. |
| Pivot Hinged | Moderate (reduced swing arc) | Wide | Requires careful measurement of the outward swing path around nearby fixtures. |
| Walk-In Screen | Zero | Open access | Higher risk of water splash if the screen is too short or poorly positioned. |
Make a Corner Work Harder
Tucking a shower into an unused corner is the fastest way I know to reclaim dead floor space in a cramped layout. Instead of forcing a bulky box into the middle of the room, a smart corner shower enclosure lets you keep the center walkway open while placing the plumbing neatly against two walls.
When you are planning a corner shower layout for a small bathroom, each shape solves a slightly different spatial headache:
Quadrant Enclosures
A standard quadrant shower enclosure uses a curved front that tucks cleanly into a corner. By rounding off that sharp outer edge, you keep the entry path clear and avoid bumping into corners when moving between the vanity and toilet. For example, our quadrant shower enclosure with a single curved hinged door uses 8mm safety glass to deliver a smooth corner entry without eating into the room's center.
Offset Quadrant Enclosures
If one wall has a few extra inches to spare, an offset quadrant gives you a longer showering footprint on one side while keeping the same curved, space-saving front. Pairing this shape with a double sliding door mechanism keeps the opening completely within the frame so it never collides with nearby fixtures.
Pentagonal Enclosures
When a toilet or radiator sits right beside your shower zone, a pentagonal enclosure changes the geometry in your favor. Its angled front cuts across the corner at 45 degrees, creating a clean entry path that bypasses tight obstructions where a squared-off door would get stuck.
Square and Rectangular Corner Enclosures
Straight-edged square and rectangular units offer the most predictable interior elbow room, provided your floor plan can handle the entry clearance: Square footprints fit compact recesses nicely, though hinged doors need careful swing checks. Rectangular L-shape units stretch along a longer wall—using a sliding glass door on an 8mm frameless rectangular enclosure gives you generous showering space without needing outward swing room.
L-Shape vs. U-Shape Configurations
How many walls you build against directly changes your usable floor area: L-Shape Corner Units: Built into two existing bathroom walls, requiring just one return side panel and a door. This keeps the footprint compact and leaves two full sides of the room open. U-Shape Configurations: Mounted against a single flat wall using two side panels. While great for wider walls, U-shape enclosures project further into the room and require extra clearance on both sides.
| Enclosure Shape | Wall Requirement | Best Layout Fit | Key Spatial Trade-Off |
|---|---|---|---|
| Quadrant | 2 walls (Corner) | Tight rooms needing clear central walkways | Slightly less interior elbow room at the front |
| Offset Quadrant | 2 walls (Corner) | Layouts with one longer wall available | Requires asymmetric floor space along one side |
| Pentagonal | 2 walls (Corner) | Corners flanked closely by a toilet or sink | Angled entry width is narrower than wide sliders |
| Rectangular L-Shape | 2 walls (Corner) | Narrow rooms with wall length to spare | Needs a sliding door if adjacent space is tight |
| U-Shape (2 Side Panels) | 1 flat wall | Single-wall runs where corners are blocked | Projects deeper into the center of the bathroom |
Pick the Shape That Fits Your Tape Measure
There is no universal "small bathroom" size, so let your exact wall measurements dictate the enclosure shape rather than forcing a favorite style to fit. Measure both wall lengths, check the distance to your nearest sink or toilet, and choose the footprint that leaves comfortable standing room both inside and outside the glass.
Use Clear Glass to Keep the Room Visually Open
When a bathroom is tight on square footage, heavy borders and dark curtains chop the room into tiny boxes. I always recommend swapping visual barriers for transparent glass so your eye travels straight to the back wall, making the entire layout feel noticeably wider and brighter.
Frameless vs. Framed: Cutting Down Visual Clutter
- Frameless glass enclosures: Removing bulky perimeter frames eliminates visual gridlines across the room. Modern frameless glass shower enclosures (such as the Ravenna 17 sliding door or Ravenna 17-2nd L-shape unit) rely on clean edges and minimal hardware, keeping the footprint looking open and refined.
- Framed designs: Heavier metal borders outline the exact boundaries of the stall. While sturdy, those visible frames draw attention to how tight the corner actually is.
Clear vs. Frosted or Patterned Glass
Choosing between transparency and privacy comes down to who shares the bathroom and how much natural light you have:
| Glass Finish | Visual Impact | Best For |
|---|---|---|
| Clear / Transparent Glass | Preserves unobstructed sightlines and maximizes light flow across a compact layout. | Solo or couple bathrooms where making the room feel larger is the top priority. |
| Frosted or Patterned Glass | Adds built-in privacy (like the stripe pattern on our bifold over-bath screen) while subtly breaking up the sightline. | Shared family bathrooms or spaces where someone uses the vanity while another showers. |
Check Safety Specs and Glass Thickness
Before buying any compact shower enclosure, verify the build specs so you are not sacrificing durability for a lighter look:
- Toughened safety glass: Always look for certified toughened safety glass designed to withstand daily temperature shifts and impacts—you can review our shower enclosure glass breakage safety tips to see how proper handling and specs keep panels secure.
- 8mm glass thickness: Our frameless models—including the Ravenna 6 quadrant and Ravenna 17 series—use 8mm safety glass, giving frameless panels the rigid, solid feel you want without needing heavy top-to-bottom framing.
- Protective coatings: Where available on glass doors, nano-coated surfaces help repel water marks and soap buildup so clear panels stay transparent with less scrubbing.
Consider a Walk-In Shower Only If the Layout Supports It
A doorless setup looks effortless, yet squeezing one into a tight bathroom without planning for water spray leaves you mopping puddles after every rinse. I always check the surrounding floor plan before recommending a fixed glass panel.
How a Fixed Screen Opens Up Tight Layouts
A walk-in shower screen removes the swinging door entirely, keeping your entry path clear and cutting down on heavy framing. Using clear, colored, or patterned glass panels lets light travel across the room so a compact bathroom feels much wider.
Practical Requirements for Splash Control
Because there is no door sealing the wet zone, your plumbing and floor layout have to do the heavy lifting: Screen length: Make sure the fixed panel extends far enough to block direct spray from reaching your vanity, toilet, or bath mat. Shower head position: Aim the showerhead toward a tiled wall or back into the wet zone rather than directly toward the open entry gap. Drainage and floor slope: Ensure your floor fall or compatible shower tray channels water straight into the waste before it creeps across the room.
Walk-In Screen vs. Full Shower Enclosure
| Layout Factor | Walk-In Shower Screen | Full Shower Enclosure |
|---|---|---|
| Door Clearance | Zero door swing needed | Requires space for a sliding, bi-fold, or hinged entry |
| Splash Containment | Relies on screen length, head angle, and floor drainage | Fully seals water inside the showering area |
| Best Room Fit | Longer rooms where nearby fixtures sit outside the splash zone | Tight corners where a toilet or sink sits right beside the shower |
| Ease of Entry | Wide, open access with minimal barriers | Defined doorway width based on the chosen door style |
Accessibility and Easy Entry
Removing moving doors and bulky tracks creates a cleaner, wider entry path that makes stepping in and out much easier for everyday use. If a nearby toilet or vanity leaves zero room for a buffer zone, sticking with a compact sliding or bi-fold enclosure keeps the rest of your bathroom dry.
Keep a Bath and Shower in One Footprint
When you cannot give up your tub in a multi-purpose or family layout, a separate shower stall is off the table. Instead of squeezing a standalone shower enclosure for a small bathroom into tight floor space, combining both functions in one footprint is often the cleanest fix. In my experience, pairing a tub with an over-bath shower screen gives you full-height splash protection without eating up extra square footage.
Folding Screen vs. Fixed Screen vs. Shower Curtain
Choosing the right barrier over a tub comes down to how you use the space every day:
- Folding Over-Bath Screens: A folding over-bath shower screen with a reversible glass panel tucks neatly back against the wall when not in use. This opens up wide access for bathing kids, cleaning the tub, or reaching the faucet, while still blocking water spray when extended.
- Fixed Glass Screens: A single stationary panel gives a clean, minimal look with zero moving parts, though it narrows your entry gap to the tub and makes reaching the far end harder during cleanup.
- Shower Curtains: Curtains cost less upfront and clear the tub edge completely, but they cling inward during showers, trap moisture, and visually close off a compact room compared to clear or stripe-patterned glass.
Checking Dimensions and Folding Direction Before Buying
Even a compact bath screen needs a quick clearance check so it does not clash with nearby fixtures:
- Confirm Panel Width and Height: Standard options like a 1400 x 1200mm bifold over-bath screen cover the main splash zone, so measure your tub rim and ceiling height to verify coverage.
- Plan the Folding Arc: Check which way the panels fold—inward over the tub or outward into the room—to make sure the glass will not hit a nearby vanity, toilet, or towel bar.
- Use Reversible Panels for Flexibility: Opting for a reversible glass design lets you fit the screen on either the left or right end of the tub, matching your existing plumbing and showerhead placement.
Use Finishes and Storage to Reduce Clutter
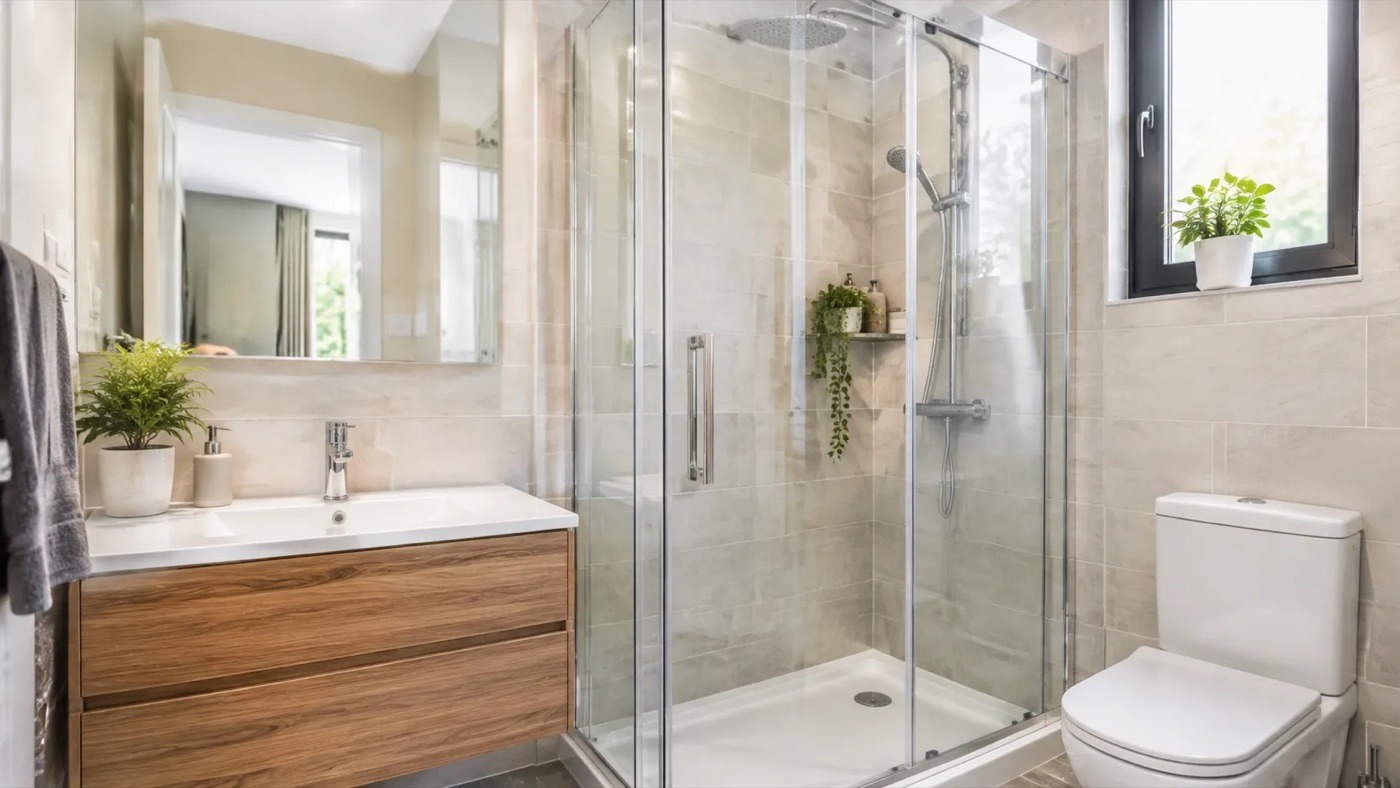
Even the smartest compact shower enclosure can feel cramped if the surrounding walls and floor are covered in visual noise. When I plan a tight bathroom layout, I rely on clean surfaces and built-in storage to keep sightlines clear and the entry path unobstructed.
- Choose light, reflective wall finishes: Pale surfaces bounce natural and artificial light back into the room, helping a tight corner feel noticeably brighter and more open.
- Minimize grout lines and breaks: Larger-format wall tiles or smooth, continuous wall panels cut down on grid-like visual interruptions, letting your eye read the wall as one unbroken expanse.
- Build in recessed shower niches: Where wall depth and existing plumbing allow, recessing a shelf directly into the shower wall keeps shampoo and soap completely out of your elbow room.
- Keep the floor and entry clear: Never leave bottles sitting on the shower tray rim or floor. Keeping accessories elevated prevents tripping hazards and preserves precious standing space inside a compact shower tray.
- Coordinate your enclosure finishes: Match the look of your clear or patterned glass, shower tray, faucets, and towel rails—such as an enclosure with an integrated towel rail bar—so every fixture feels unified rather than pieced together.
Match the Shower Tray and Enclosure to the Room
A great small bathroom shower enclosure only works as well as the base supporting it. Pairing the wrong tray shape or overlooking floor drainage creates leaks, uneven seals, and unnecessary step-up height in tight spaces.
Ceramic vs. Stone Resin Shower Trays
When selecting a compact shower tray, the material determines both durability and how cleanly the unit sits against your walls:
| Tray Material | Best For | Key Practical Considerations |
|---|---|---|
| Stone Resin | Modern frameless enclosures, low-profile entries, and heavy safety glass doors | Provides a rigid, solid underfoot feel that supports thicker 8mm glass panels without flexing. |
| Ceramic | Traditional finishes and matching existing bathroom fixtures | Offers a classic glazed surface; requires a completely level subfloor and careful handling during installation. |
Confirm Shape, Dimensions, and Drainage
Before ordering, verify that your tray and enclosure share identical specifications rather than assuming standard sizes are interchangeable:
- Match the Exact Footprint: A curved quadrant shower enclosure with a hinged door requires a matching quadrant radius tray, while offset quadrant, pentagonal, and rectangular units each need their corresponding tray profile.
- Check Waste Position and Subfloor Access: Confirm where the drain sits on the tray and make sure your floor joists and pipework align underneath without forcing awkward bends.
- Plan Threshold Height: Check the overall step-in height—especially if subfloor plumbing requires raising the tray on a riser kit—so entering and exiting feels comfortable in a narrow room.
- Follow Installation Guides: Always review the product installation guides and product certificates before starting work, and bring in a qualified installer when aligning heavy toughened glass panels or sealing wet-zone drainage.
Common Small-Bathroom Enclosure Mistakes to Avoid
Even the smartest compact shower enclosure can turn into a daily headache if a small detail gets overlooked during planning. From what I see in tight bathroom remodels, most layout regrets come down to a few predictable missteps:
- Choosing a door without checking its full opening arc: A pivot or hinged door might look sleek on paper, but if it swings straight into your toilet, vanity, or towel rail, getting in and out becomes awkward fast. Always map out the full clearance path before committing, or switch to a sliding or inward-sliding option.
- Measuring the enclosure footprint without checking the entry route: Knowing the corner dimensions isn't enough. You also need clear walking space to step out onto a bath mat and move comfortably between fixtures without squeezing past glass panels.
- Selecting a walk-in screen without planning for splash zones and drainage: Doorless walk-in shower screens create a clean, open look, yet placing one in a space that is too shallow without adequate drainage leaves water pooling across the bathroom floor.
- Assuming all shower trays or side panels are interchangeable: Shapes like quadrant, offset quadrant, pentagonal, and rectangular L-shape or U-shape units require matching bases. Always pair your enclosure with a compatible ceramic or stone resin shower tray and check whether panels are reversible.
- Prioritizing the smallest footprint over comfortable movement: Shrinking the shower down too aggressively saves floor space outside, but makes washing, bending, or turning inside feel cramped. Balance room clearance with practical elbow room.
- Overlooking installation access and product-specific fitting instructions: Heavy toughened safety glass—such as 8mm frameless panels—needs solid wall support and proper handling. Review the installation guide and product certificates early so wall conditions and fitting tolerances don't surprise you mid-project, especially when browsing a buyer's guide for smaller bathrooms
How to Choose the Right Enclosure for Your Bathroom
Picking the right shower enclosure for a small bathroom comes down to matching the door action and footprint to your exact floor plan. When I help homeowners narrow down different types of shower enclosures for tight spaces, I always match the layout bottleneck to the simplest mechanical fix:
| Bathroom Layout Challenge | Best Enclosure & Door Style | Key Space-Saving Benefit |
|---|---|---|
| Narrow room with tight walkways | Sliding or inward-sliding doors (such as an inward-sliding enclosure with a built-in towel rail bar) | Keeps the door inside the shower frame so it never bumps into a nearby vanity or toilet. |
| Unused corner in a compact room | Quadrant, offset quadrant, or pentagonal angled enclosures | Trims sharp front corners to open up central floor clearance while preserving comfortable elbow room inside. |
| Limited outward door clearance | Bi-fold and inward-opening doors | Folds or swings inward so you do not need clear floor space outside the cubicle to step in. |
| Dark or visually cramped room | Frameless clear 8mm toughened safety glass or a walk-in shower screen | Eliminates heavy borders and door frames to keep sightlines open across the room, provided your layout handles splash control. |
| Single tub-and-shower footprint | 1400 x 1200mm bifold over-bath shower screen (reversible panel) | Lets you keep a full bathtub while folding neatly back out of the way when not in use. |
Pre-Purchase Measurement and Specification Checklist
Before ordering any compact shower enclosure or matching tray, run through these essential checks so everything fits on installation day:
- Measure finished wall-to-wall dimensions: Measure at the top, middle, and bottom of your tiled walls, not just at floor level, to spot uneven walls early.
- Map the door swing and entry path: Confirm that outward-opening pivot or hinged doors clear the toilet, sink, radiator, and bathroom entry door—or switch to a sliding, inward-sliding, or bi-fold model.
- Verify glass thickness and safety specs: Look for 8mm toughened safety glass on frameless and sliding enclosures, and check whether panels are reversible for left- or right-hand installation.
- Match the shower tray and waste: Pair your enclosure shape with a compatible ceramic or stone resin shower tray with waste, confirming the exact shape (quadrant, rectangular, or pentagonal) and drain position before installation.
- Review fitting instructions in advance: Download the product installation guide and check product certificates to verify wall-channel adjustments and seal requirements.
Frequently Asked Questions
Is a quadrant shower enclosure a good choice for a small bathroom?
Yes—quadrant and offset quadrant enclosures are built specifically to tuck neatly into a 90-degree corner. Because the front glass curves inward rather than jutting out at a sharp right angle, you gain valuable walking clearance in the middle of the room while preserving a comfortable showering area inside.
Can a walk-in shower work in a small bathroom?
A walk-in shower screen works well in a small bathroom if your layout gives the fixed glass panel enough length to contain water spray. Because there is no door to swing open, it keeps sightlines wide open. However, if your bathroom is very short or fixtures sit close to the splash zone, a fully enclosed unit with a sliding or bi-fold door will keep the rest of the floor much drier.
How much space should I leave in front of a shower enclosure?
You need enough clear floor space in front of the entry to step in, step out, and dry off comfortably without hitting a sink, toilet, or baseboard heater. If you choose a pivot or hinged door, that clearance must exceed the full outward swing radius of the glass panel. With sliding, inward-sliding, or bi-fold doors, you only need comfortable standing and entry room.
Is an over-bath shower screen a practical space-saving option?
Yes, especially when you need to keep a bathtub and a shower in one shared footprint. A 1400 x 1200mm bifold over-bath shower screen folds neatly back against the wall when not in use, giving you full access to the tub while preventing water splashes during a shower—and offering a much cleaner, easier-to-maintain finish than a clinging shower curtain.
What should I measure before buying a shower enclosure?
Before ordering, verify these core measurements against the product's stated dimensions: Usable alcove or corner width and depth after wall tiling is accounted for. Ceiling height to ensure the enclosure and showerhead clear the top rail. Clearance distances from the enclosure edge to the toilet, vanity, radiator, and main bathroom door. Tray and waste compatibility, making sure your ceramic or stone resin shower tray matches the exact shape and footprint of the enclosure.
Durovin Bathrooms are based in Walsall, UK and a bathroom supplier to mainland UK. We sell a wide range of products for anyone to improve their bathrooms.
Read More About UsAddress
Unit 14 Bentley Lane Industrial Park, Bentley Lane, Walsall, WS2 8TL
E-Mail us
info@durovinbathrooms.co.ukPhone
01922 627 773© Durovin Bathrooms® 2025